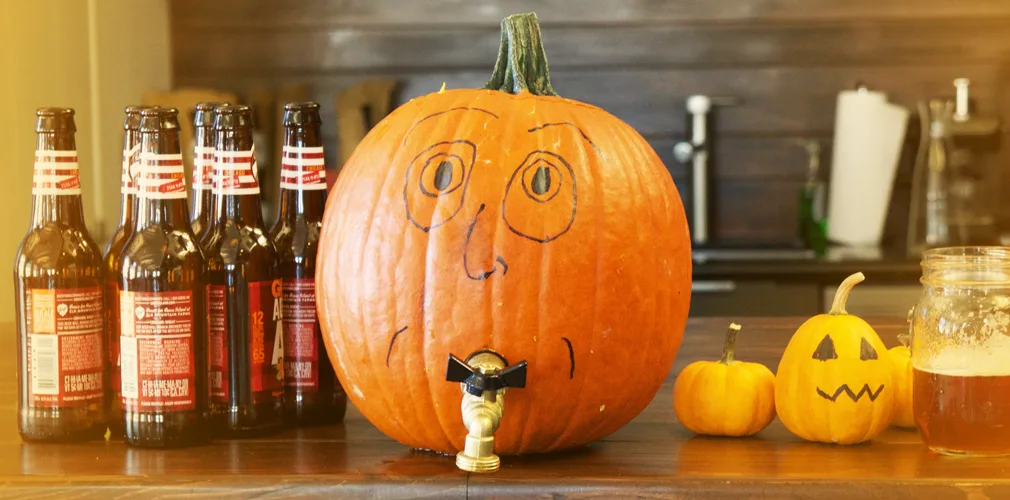
Thinking of having a Falloween party? Thinking of having a keg at that Falloween party? What if that keg was actually a pumpkin?!
Yes, that’s right. Forget the keg– you can make your very own beer dispensing pumpkin in about 30 minutes. The best part? If you let that beer brew and stew in your “drank o’ lantern” you’ll get yourself a homemade pumpkin ale!
What you’ll need:
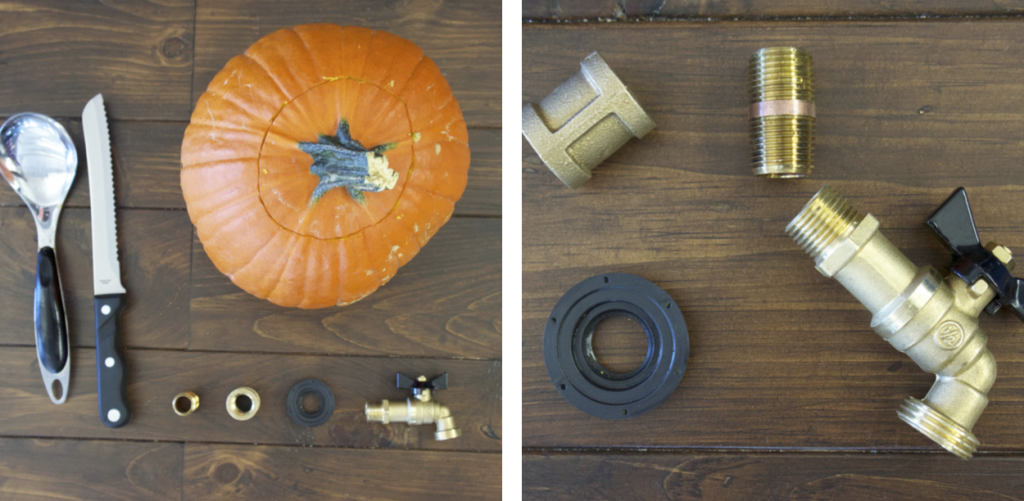
– The perfect pumpkin. Pick one with at least a 30″ circumference so you can fill it with a sixer worth of beer or more.
– A knife. A paring knife is best, but you can pretty much use anything that’s sharp, we found that even an excessively sharp butter knife will do the trick.
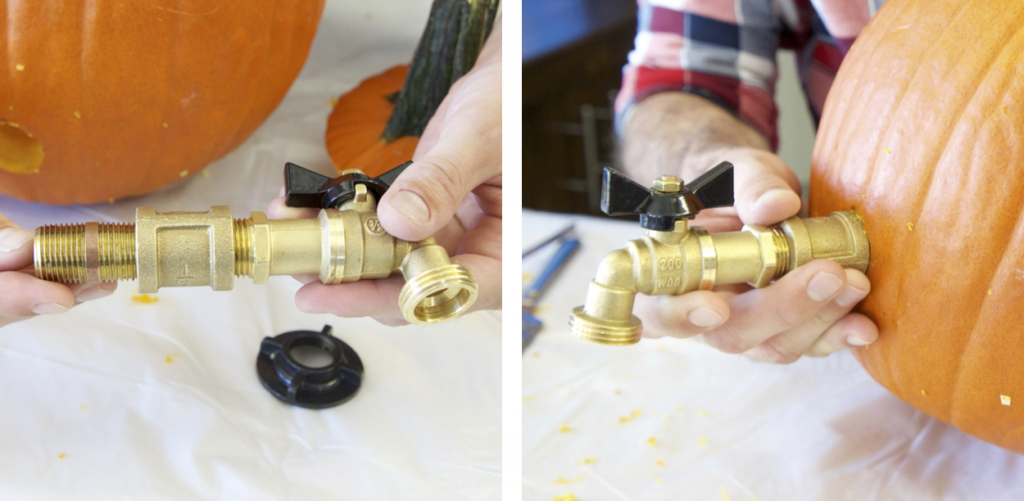
– Garden hose spigot and couplings. Don’t panic, these items are all cheap and are readily available at your local hardware store. You’ll need a Hose cock (tee hee), a 1/2″ Brass Nipple (tee hee) and a 1/2″ Brass Pipe Coupling (aw). Better yet, print out the picture we’ve included in this post and bring it to a person who knows what all this means. All said and done, this stuff will run you about $20 max.
– Beer. Brew your own, or just buy some. We suggest something like an amber or autumn style ale that’ll soak up those subtle pumpkin flavors real nicely.
– A scooper. A large serving spoon, ice cream scooper or even a small rounded bowl can come in handy, but if you’re not afraid of all that spooky gook… just use your hands.
The Steps:
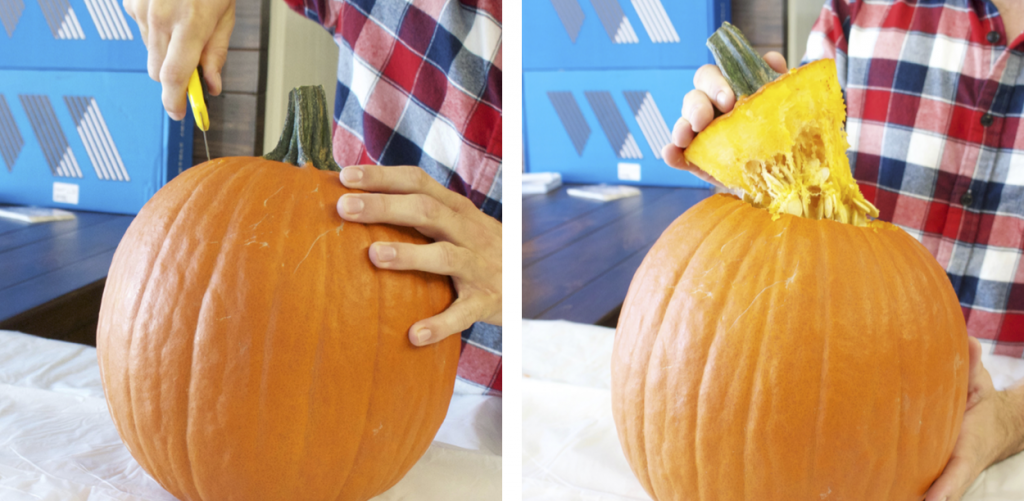
1) Remove the top of your pumpkin. Carve around the stem, fully puncturing the pumpkin as if you were making a jack o’ lantern. Pull up on stem to remove top.
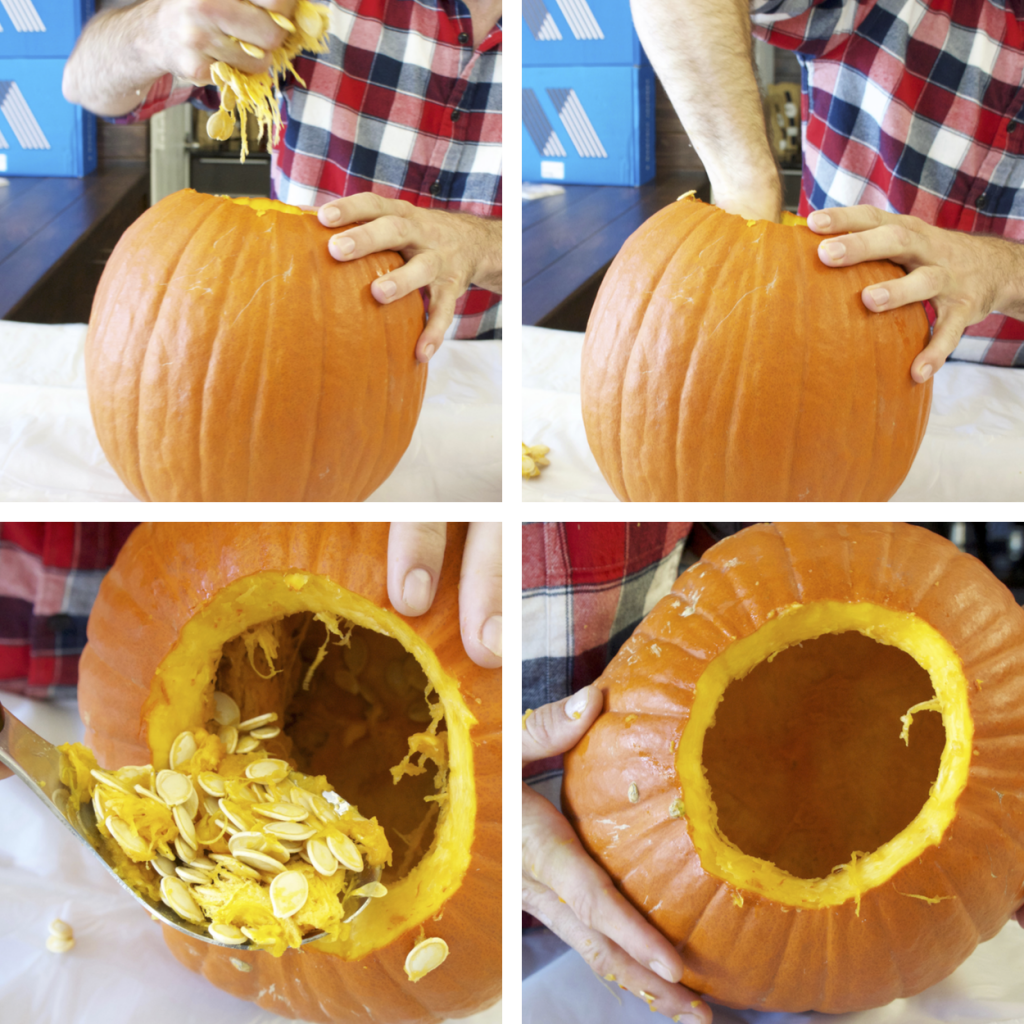
2) Disembowel your pumpkin. All of the seeds, gunk and stringy stuff inside of that pumpkin should be scooped out. Make sure to scrape the inner walls of your pumpkin as well, in order to ensure that no leftover particulate gets caught in the flowing tap later on.
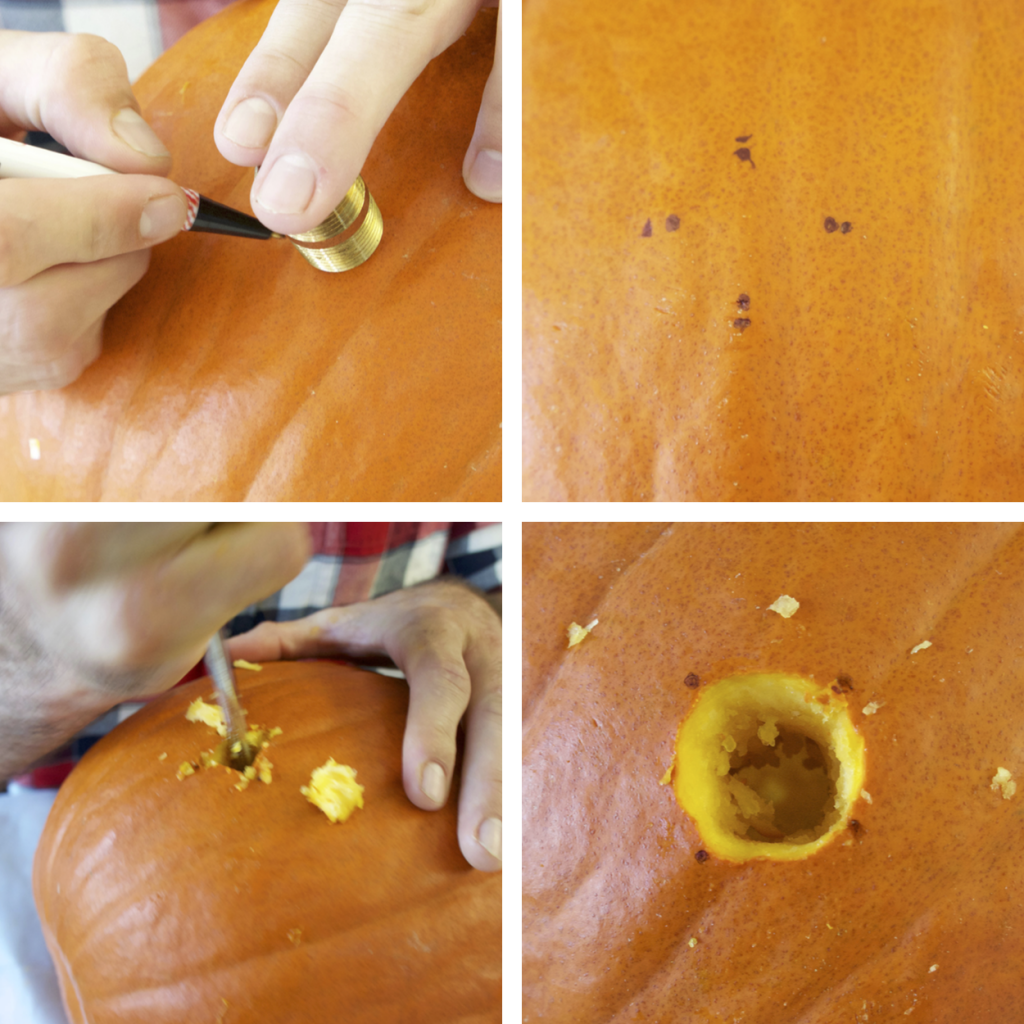
3) Mark off the location of your tap. Place the end of your coupling on the surface of the pumpkin where your tap will go. Use a marker or pen to mark the diameter of the coupling. Then, once coupling is removed from pumpkin, make new markers on the inside of your original markers. Carve the hole using these new markers so that the hole is slightly smaller than the diameter of the coupling, ensuring a liquid tight squeeze.
4) Combine spigot and couplings and put into hole. Assemble your tap, and gently push into hole. Try slowly screwing it in for optimal grip and liquid tightness.
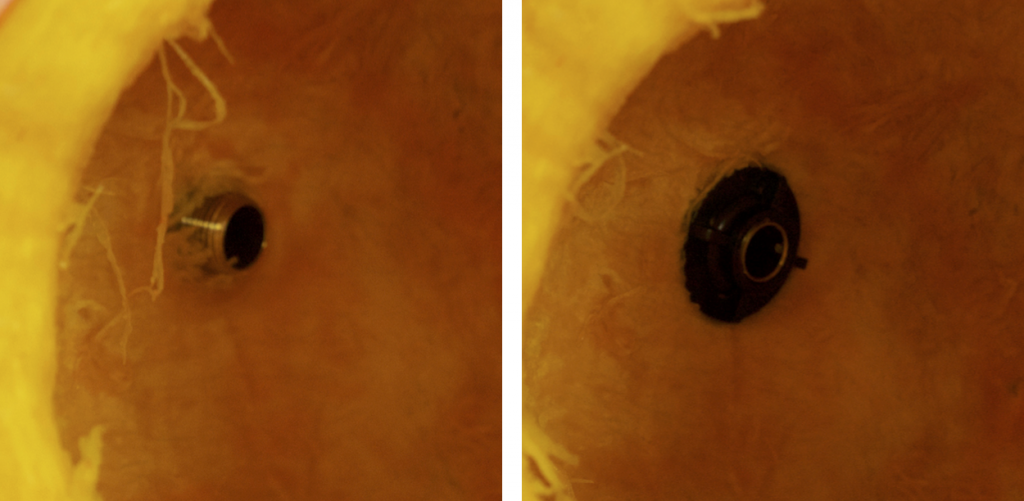
5) Screw plastic nut onto coupling on inside of pumpkin. Take that seemingly random plastic thing and screw it onto the end of the coupling that is inside your pumpkin. This will help seal the hole and keep your tap clamped into the pumpkin.
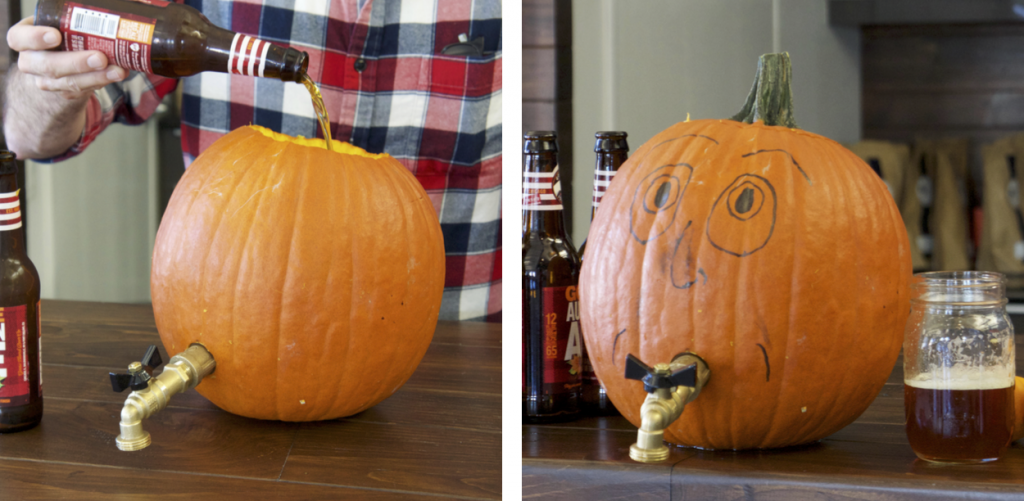
6) Get pouring and partying. Fill your pumpkin up with beer slowly to ensure there are no leaks or tweaks to be made. Once it’s all full, you’re ready to have your pumpkin keg party. Remember, the longer your ale sits inside of your brand new keg the more it’ll absorb those fresh pumpkin flavors.








ok so I am going to take the nozzle off my tea jug, thinking that will work just as good
YOYOU CAN BUY PLASTIC SPIGOTS AT YOUR LOCAL HOMEBREW SUPPLY STORE . . . THESE SHOULD DO
JUST FINE